Available 7 Days a Week | Emergency Service Available
Call Now: 0333 567 2349 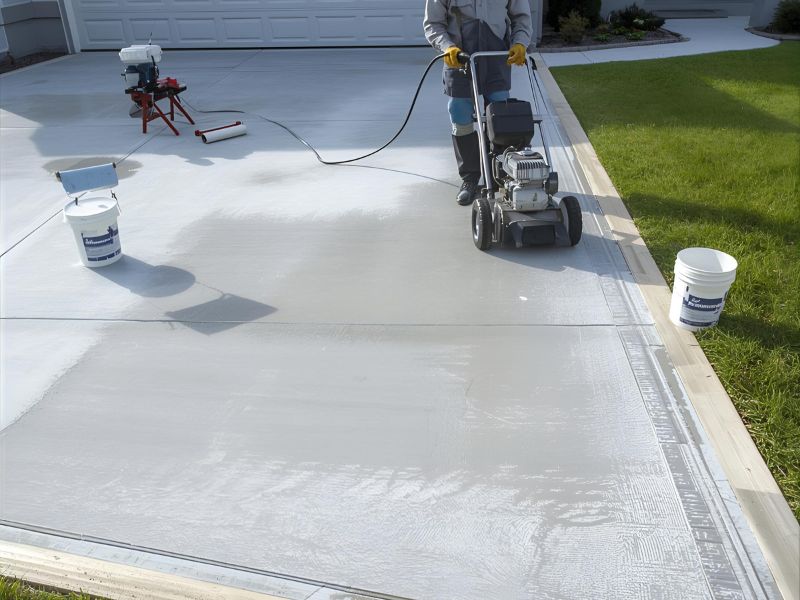
Transforming your concrete driveway with a fresh coat of paint can dramatically improve your property's kerb appeal. Whether you're updating a residential home or maintaining commercial premises, proper preparation is the foundation of a successful painting project. Research shows that preparation accounts for up to 60% of the job, making it the most critical factor in determining whether your painted concrete driveway will last years or fail within months.
Most homeowners and property managers underestimate the importance of preparing concrete surfaces before painting. Without thorough preparation, even the best driveway paints will fail prematurely. Concrete can absorb up to a litre of water per square metre due to its porous nature, and oil stains are responsible for 70% of paint adhesion failures on driveways.
When you properly prepare your existing driveway, you create the ideal surface for paint to bond effectively. This means your investment in floor paints and epoxy coatings will deliver the durability and appearance you expect.
Before you begin painting your concrete driveway, gather these essential supplies:
Cleaning Equipment:
Preparation Materials:
Safety Equipment:
Painting Supplies:
Start by removing all vehicles, furniture, and debris from your driveway. Sweep away loose dirt and other debris that could interfere with the cleaning process. If you're also wondering how to remove driveway paint, this initial preparation is essential before applying any specialized treatments.
For thorough cleaning, pressure washing removes around 90% of surface dirt, making it the most effective first step. Set your pressure washer to appropriate settings and systematically work across the concrete surfaces, paying special attention to areas with visible staining or moss growth.
After pressure washing, allow the surface to dry completely. This is crucial because concrete should dry for at least 24 to 48 hours after washing, even if the surface appears dry to the touch.
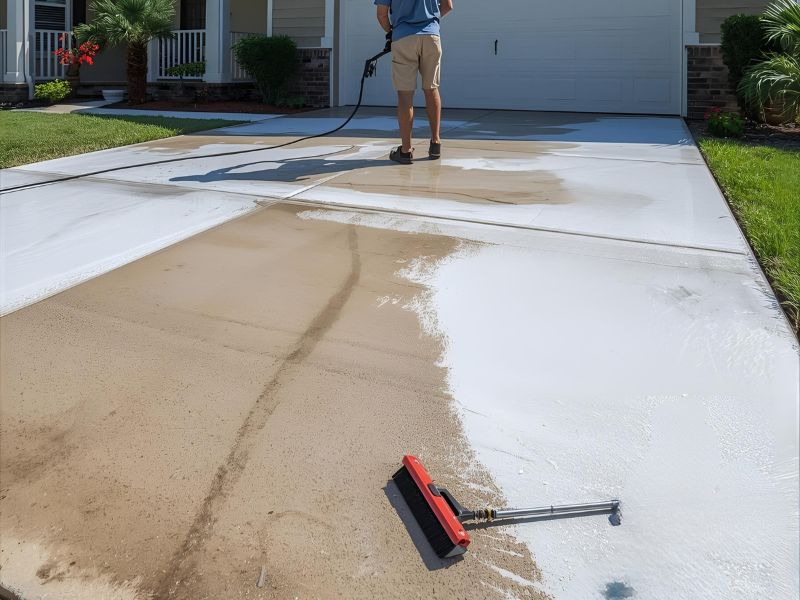
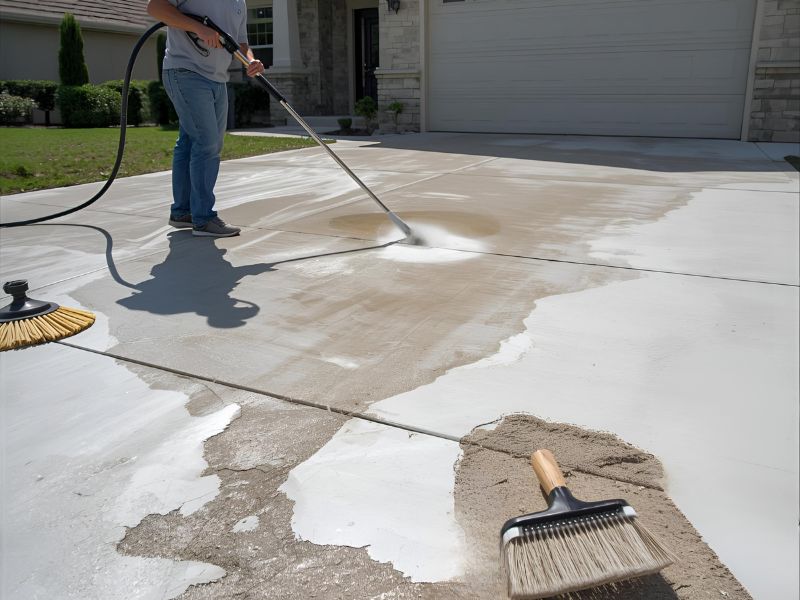
Oil stains require special attention as they create a barrier that prevents proper paint adhesion. Apply a commercial concrete degreaser to affected areas and scrub with a wire brush. For older, set-in stains, you may need to repeat this process several times.
Common household remedies like dish soap can help with lighter stains, but commercial degreasers are more effective for heavy contamination. Allow the degreaser to work according to manufacturer instructions before rinsing thoroughly.
Inspect your concrete driveway carefully for cracks, holes, and other structural issues. Hairline cracks can expand by 25% within a year if left untreated, so addressing them now prevents future problems.
Use appropriate concrete crack filler for smaller cracks and a more substantial patching compound for larger holes. Fill all imperfections slightly above the surrounding surface level, as most fillers shrink slightly as they cure.
Allow repairs to dry completely according to manufacturer recommendations before proceeding. This step is essential for achieving a smooth, professional finish.
Etching increases paint adhesion by up to 40% by creating a slightly roughened surface that helps paint grip better. You can use traditional muriatic acid solutions or eco-friendly etching products designed for concrete preparation.
Follow all safety guidelines when working with etching solutions. Apply the product evenly across the concrete floor using a sprayer or brush, then scrub with a stiff brush to ensure proper penetration.
After etching, rinse the surface thoroughly with clean water and allow it to dry completely. The concrete should feel slightly rough to the touch when properly etched.
Before you start painting, perform a final cleaning to remove any etching residue and dust. A thorough cleaning ensures optimal paint adhesion and prevents contamination of your first coat.
Inspect the entire surface for any missed spots, remaining stains, or areas that need additional preparation. Address any issues now, as they'll be difficult to correct once you begin painting.
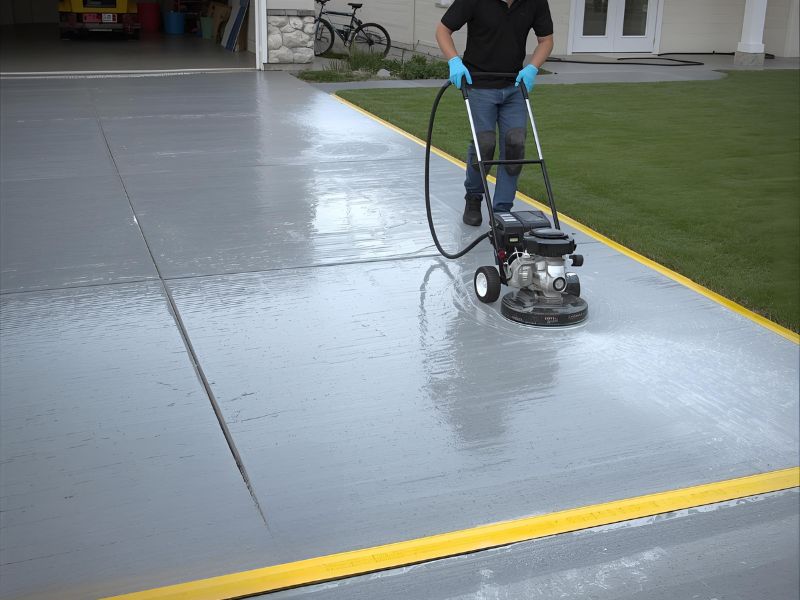
Priming can extend the paint life by 3 to 5 years and is essential for long-term durability. Choose a high-quality concrete primer specifically designed for floor applications.
Apply the primer using a paint roller, working in manageable sections to maintain a wet edge. For best results, use a brush to cut in around edges and ensure complete coverage in corners and against walls.
Allow the primer to dry completely according to manufacturer specifications before applying your topcoat. Most concrete primers require 4 to 8 hours drying time, depending on temperature and humidity.
Before opening your paint containers, plan your painting approach carefully. Consider weather conditions, as you'll need several hours of dry weather for each coat to cure properly.
Start painting at the furthest point from your exit route to avoid trapping yourself. For driveways, this typically means beginning at the garage end and working toward the street.
When you're ready to paint your concrete driveway, start with the right paint for concrete surfaces. Epoxy coatings offer superior durability for high traffic areas, while standard concrete paint works well for lighter-use applications.
Apply paint in thin, even coats using a high-quality paint roller. Maintain a wet edge to prevent lap marks and ensure uniform coverage. Use a brush for cutting in around edges and detailed areas.
Most quality driveway paints require two coats for optimal coverage and durability. Allow the first coat to dry completely before applying your second coat. This typically takes 4 to 8 hours, depending on paint type and environmental conditions.
Concrete Paint: Standard concrete paint provides good coverage and comes in various colours. It's suitable for residential driveways with moderate traffic, and often comes up when people ask what type of paint do you use on a driveway.
Epoxy Paint: Epoxy coatings offer superior durability and chemical resistance. They're ideal for driveways that see heavy use or exposure to automotive fluids.
Floor Paints: Specially formulated floor paints provide enhanced durability and are often self priming, which can simplify your painting project.
Weather Considerations: Avoid painting when rain is forecast within 24 hours. Ideal conditions include temperatures between 10°C and 30°C with low humidity.
Coverage Planning: Most driveway paints cover approximately 4-6 square metres per litre on properly prepared concrete. Calculate your needs accordingly and purchase slightly more paint than calculated.
Tool Maintenance: Clean your paint roller and brush frequently during application to maintain smooth coverage and prevent dried paint buildup.
A properly prepped driveway can hold paint for 8 to 10 years when all preparation steps are completed correctly. Regular maintenance includes:
For future touch ups, keep detailed records of paint colours and types used. Store leftover paint properly for minor repairs.
While thorough preparation requires more upfront time and effort, skipping prep can double long-term costs. Paint applied without proper preparation typically fails within 1 to 2 years, meaning property owners end up repainting twice as often. This leads many to consider not just the practical steps, but also how much does it cost to get your driveway painted in the UK, especially when evaluating long-term value.
Investing in quality concrete sealer, proper cleaning equipment, and high-grade paints pays dividends in durability and appearance retention. Commercial properties particularly benefit from this approach as it reduces maintenance disruptions and preserves professional appearance.

Always prioritise safety when working with concrete preparation materials:
While many property owners can handle basic concrete preparation themselves, some situations benefit from professional expertise. Complex repairs, large commercial projects, or driveways with extensive damage may require professional assessment and preparation.
Consider professional services when dealing with:
Professional preparation ensures optimal results and can actually be cost-effective for larger projects when you factor in equipment rental, material costs, and time investment.
Ready to transform your concrete driveway with professional-quality results? At Driveway Painting UK, we understand that proper preparation is the key to a lasting, beautiful finish. Our experienced team can handle every aspect of your project, from initial assessment through final coating application.
Whether you're planning a DIY project and need guidance or prefer professional preparation and painting services, we're here to help. Contact Driveway Painting UK today for your free consultation and quote. Let us help you achieve the durable, attractive driveway finish your property deserves.